Can You Cut LED Light Strips?
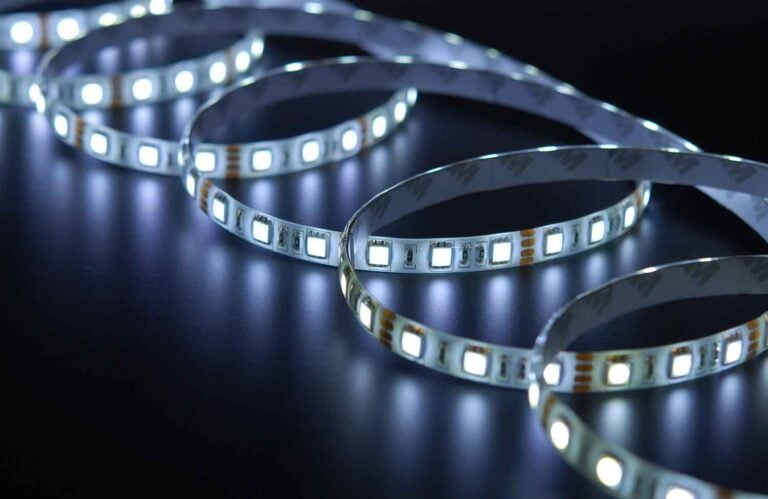
LED light strips are a highly versatile form of LED lighting that can add ambience to any space. Wherever you choose to place your LED strip lights, you’ll likely need to customise them so they fit their location perfectly. Luckily, for the majority of LED strip light models, it’s possible to cut them down to size.
Yes, you can cut LED light strips, providing that the fixture is a cuttable model. Regular, RGB, and waterproof strip lights are all safe to cut as long they have clearly marked cut lines; these fixtures contain individual closed circuits demarcated with lines that indicate the fixture’s safe cutting points. However, it isn’t possible to cut RGBIC strip lights, as these fixtures utilise a different type of circuitry.
Can You Cut LED Light Strips?
With most models, yes, you can cut LED light strips. You’ll know if your LED light strip is safe to cut by looking for cut lines marked along the fixture. You can also check the specifications for your particular strip lights to fully ensure they’re safe to cut. If your LED strip lights lack these markings, or state as such in their specifications, they aren’t cuttable.
Cuttable LED strip lights come with ‘cut lines’, which are solid or dotted lines at regular intervals along the strip. These lines indicate the points at which the circuits of the LEDs are entirely closed. It’s therefore possible to cut the strip lights at these points without damaging or affecting the operation of the lights.

The exact location of the cutting lines may vary from product to product. Typically speaking, the cut lines will fall between every 3 individual LEDs. For instance, a strip light fixture with 30 LEDs per meter will likely have cutting lines every 10cm. You can also locate the safe cutting points by looking for copper soldering pads on each side of the line.
Can You Cut Waterproof LED Light Strips?
Yes, you can cut waterproof LED strip lights like other models of cuttable LED strip lights. However, take note that cutting a waterproof LED strip light will render the fixture no longer waterproof.
Again, you must check the specifications for your specific model to ensure that they’re safe to cut. As long as this is the case, it’s possible to cut waterproof LED strip lights. Unfortunately, in doing so, you will diminish the waterproof properties of the strip lights; the new connection point at the cut will then be exposed to water and moisture.
Can You Cut RGBIC Light Strips?
No, RGBIC strip lights are the one type of LED strip light fixture that you cannot safely cut. The circuitry on these specific fixtures does not allow for the fixture to be cut without damaging the lights.
The LEDs in RGBIC fixtures are controlled by individal IC chips that sit between every few diodes along the strip. These chips are black and roughly the same size as pencil eraser. Unlike regular or RGB strip lights, the IC chips in RGBIC fixtures can independently control different colours. This technology means that it isn’t possible to cut these fixtures without affecting their operation.
Will Both Sections of an LED Light Strip Work After You Cut them?
Yes, both sections of an LED strip light will work after cutting the fixture, providing you do it correctly. To reiterate, the cut lines indicate where the circuits of the strip lights are closed. In other words, these are the points at which it’s safe to cut without disrupting the circuit powering the LEDs.
Between the cutting lines, each section of the LED strip light contains a small individual circuit. It’s therefore safe to cut the strip lights along any one of these lines to create two separate working strips. Oppositely, if you cut the strip anywhere other than the cut line, it could damage the circuitry of the fixture; you will then be left with two malfunctioning strips instead.
How to Cut LED Light Strips Safely
Before you begin cutting your LED strip lights, ensure that your particular model is definitely cuttable. Providing that this is the case, follow the steps below to safely cut your LED light strips.
1. Disconnect LED Strip Lights from Power
As a crucial first step, disconnect your LED strip lights from their power source. This is the best practice when working on any electrical fixture; not only is it for your protection, it also eliminates the risk of a short circuit that could damage the fixture.
2. Measure Desired Cutting Length Along the Strip
The next step is to measure the desired cutting length along the LED light strip. Taking proper measurements is essential to avoid the irreversible mistake of cutting the lights too short. Use a measuring tape to measure the desired location for the lights, before measuring this length against the fixture.
3. Find Closest Cut Line to Desired Length
After measuring the light strip, locate the closest cutting line to your desired length. As we’ve explained, the cutting points will be marked by a solid or dotted black line; the safe cutting points will also have a copper soldering pad on each side of the cut line. If you’re between two lines, choose the longer length to avoid cutting the fixture too short.
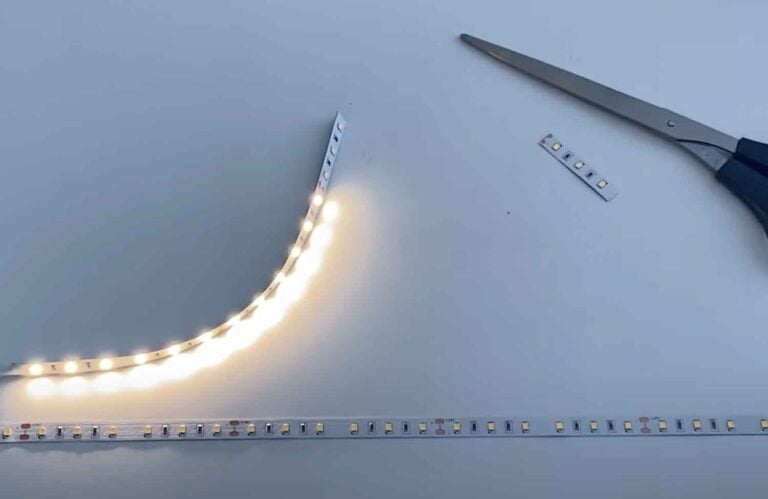
4. Cut Strip Lights with Scissors
Once you’ve located the best cutting point, you can cut your LED strip lights. Use a pair of scissors to make a precise, straight cut directly along the cut line. Take care with this step as an uneven cut could damage the lights or ruin their appearance.
Can You Reconnect Sections of an LED Light Strip After Cutting it?
Yes, as long as you’ve cut along a desinated cut line, you can reconnect two sections of an LED strip light. There’s two possible ways to do this, either by using a connector or soldering the two sections together.
Reconnecting a Cut LED Light Strip with a Connector
The easiest way to reconnect two cut LED strip lights is to use a connector. This is a small part that you’ll likely have to purchase separately to your strip lights.
1. Purchase a Suitable Connector
There are a few different types of connectors for LED strip lights; you must purchase the correct type according to the size of your model. The most common connector is a 4Pin connector that will work with 10mm wide strip lights. Other sizes include 2, 3, and 6 point connectors. If you’re unure which connector you need, you can contact the manufacturer for advice.
2. Open the Connector’s Cover if Necessary
Some connectors have covers to secure their connections with the strip lights. If this is the case, open the cover on the side of the connector before attempting to connect the lights.
3. Insert the Two Ends of the Light Strips into the Connector
Insert each end of the two strip light sections into the fastening clips of the connector. Make sure that you place both sections of the strip lights facing the right way around in the connector; the polarities must match the connector for the voltage to flow through the fixture properly.
4. Cover the Connector
Again, if your connector has a cover, close it over once you successfully insert both ends of the strip light sections. After successfully completing the previous steps, both sections of the LED lights should work properly.
Soldering a Cut LED Light Strip
The alternative option to reconnect cut LED strip lights is to solder the two sections together. For this method, you’ll require a soldering iron, extension RGB wires, a pair of wire cutters, and a heat gun.
1. Set Temperature of Soldering Iron
Switch on your soldering iron and set the temperature to around 300 degrees Celsius. There will be a knob on the soldering iron to easily adjust it to this temperature.
2. Secure Strip Light Sections to Work Surface
Use pieces of masking tape to secure the two strip light sections to your work surface. This is to prevent the strip lights from moving during the soldering process.
3. Prime RGB Extension Wires
Use your wire cutters to remove about ½ inch of the casing from the RGB extension wires. Then, take your soldering iron and apply small amounts of solder to each exposed wire.
4. Prime Copper Dots on Both LED Strip Lights
At the cutting points on each LED strip light section, there will be small copper dots for each extension wire. Place a small amount of solder on each one of these copper dots; take care not to overlap the solder on each dot as this can interfere with the colour of your LEDs.
5. Solder Extension Wire to Strip Light Connection Points
After priming both the extension wires and strip light ends with solder, you can then connect all of the parts together. Working one by one, place the wire ends to the copper dots, then melt the solder together using the soldering iron. Ensure that you connect the correct wire to the corresponding copper dot; the red wire goes to the ‘R’ dot, green wire to the ‘G’ dot, blue wire to the ‘B’ dot, and black wire to the dot marked with a ‘+’. Remember, the soldered points should be clean and not overlapping one another.
6. Plug in and Test Strip Lights
Reconnect your strip lights to a power source and switch them on. The strip lights should work as normal after following the previous steps carefully. If you notice any sparking or smoking coming from the strip lights, disconnect them from their power source immediately; this indicates that the connections are arcing, i.e. crossed, which can create a fire hazard. If the strip lights seem to be working safely, disconnect them from the power source and continue to the next step.
7. Cover Solder Joints with Heat Shrink
Peel back the adhesive strip on the strip lights far enough to allow space for heat-shrinking material. Place the heat-shrink material over the solder joints, then use a heat gun to shrink them down. If you don’t have heat shrink or a heat gun, you can use a small amount of hot glue as an alternative for this step.
8. Test Strip Lights Once More
Plug the strip lights back into a power source and test them once again. You want to make sure everything is working safely before installing the lights into their permanent location.