Why Is My Light Not Working but Has Power?
Have you ever encountered a situation where your light is not working, but it still appears to have power? This can be a puzzling and frustrating issue to face, especially when you cannot quickly identify the cause. In many cases, the problem may be due to a variety of factors such as faulty connections, burnt-out bulbs, or voltage fluctuations. In order to understand why your light isn’t working despite having power, it is essential to investigate these potential causes and apply appropriate solutions.
Understanding the basics of electricity and how lights function is crucial for tackling this issue effectively. By familiarising yourself with common electrical problems, you will be better equipped to find the root cause of the problem and determine whether it lies within the light switch, the light bulb, the circuit breaker, or even the light fixture itself. Once you have identified the problem, you may be able to fix it yourself or decide when it is necessary to seek professional help.
Key Takeaways
- Troubleshooting a light that isn’t working but has power requires understanding the basics of electricity and identifying common electrical problems.
- Investigating the issue involves inspecting the light switch, light bulb, circuit breaker, and the light fixture.
- Knowing when to seek professional help is essential for resolving more complex issues safely and effectively.
Understanding the Basics of Electricity
Before diving into the reasons why a light may not be working despite having power, it’s important to familiarise yourself with basic electrical concepts. These fundamental principles will provide you with the necessary foundation to tackle this common issue efficiently.
Electricity revolves around the presence or flow of charged particles. At the core of our understanding of electricity are four basic physical quantities: voltage (V), current (I), resistance (R), and power (P). Each of these quantities is measured using different units:
- Voltage is measured in volts (V)
- Current is measured in amps (A)
- Resistance is measured in ohms (Ω)
- Power is measured in watts (W)
To better grasp these concepts, think of electricity as a water system, where:
- Voltage is akin to water pressure
- Current resembles the water flow rate
- Resistance represents the size of a pipe restricting the flow
- Power illustrates the work performed by the flowing water
Just as with water systems, electrical circuits consist of various components that affect the flow of electricity. For successful operation, these circuits require a power source, such as a cell or battery, wires to transfer electricity, and one or several components that consume power.
Now that you have a basic understanding of electricity, you are better equipped to tackle issues related to lights not working despite having power.

Identifying Common Electrical Problems
When you encounter a situation where your light isn’t working but has power, it’s essential to identify the root cause of the issue. Several common electrical problems could be behind this problem, and understanding them can help you find the correct solution.
Power surges often cause issues with lighting. They happen when there’s a sudden spike in the electrical current flowing through a circuit. This can lead to damage to the lightbulbs, especially if they’re of cheap quality or prone to overheating. To prevent damage from power surges, consider investing in surge protectors or installing a whole-house surge protection system.
Overheating bulbs can also lead to early burnouts. Ensure that your light bulbs are compatible with the fixtures you’re using and have ample airflow around them. Using energy-efficient bulbs, such as LEDs, can help reduce overheating issues.
Switching the bulb on and off too often can shorten its lifespan. This is because frequent power cycles can cause stress on the bulb’s components, leading to damage over time. To avoid this issue, try to minimise the number of times you switch your bulb on and off daily.
Another possible issue is incompatible light fixtures. If your lightbulb isn’t suited to the fixture you’re using, it might not function correctly or might develop problems over time. Ensure that your bulb and the fixture align in terms of specifications, such as wattage, voltage, and socket size.
Loose electrical connections can be a reason for a light not working despite having power. Check for loose wires or poorly installed fixtures, and ensure all connections are secure.
Dirty or damaged fixtures can also affect your light’s performance. Regularly clean your fixtures and check for damage that could impede the flow of electricity.
Dimmer switch compatibility is another factor to consider. Some light bulbs, especially LEDs, aren’t compatible with dimmer switches, or they might require specific dimmers. Check the manufacturer’s recommendations for your bulb to ensure it’s suitable for use with a dimmer switch.
Voltage fluctuations can also affect the performance of your light bulbs. Ensure your home’s electrical supply is stable and use voltage regulators if necessary.
By being aware of these common electrical problems, you can better diagnose and rectify the issue when your light isn’t working but has power. It’s essential to address these problems promptly to maintain a safe and well-functioning home.
Investigating the Issue of Power in the Light
When you encounter a light not working but still has power, there could be several reasons behind the issue. To understand and resolve the problem, it is necessary to investigate the following possibilities:
First, inspect the light bulb itself. A common cause behind a light bulb not working is a burnt-out light bulb. Light bulbs can get damaged due to various reasons, such as power surges, poor quality materials, overheating, turning the bulb on and off too often, or receiving a higher voltage than the bulb can handle. If you find the bulb damaged, consider replacing it with a new one.
Next, examine the light socket. Unscrew the bulb and check if the socket looks burnt or damaged in any way. If it does, you may be using the wrong type of bulb, or the socket itself may need to be replaced. This task requires some electrical experience and adherence to safety precautions, but it can be a DIY project if carried out correctly.
Another critical aspect to consider is the compatibility of the dimmer switch with the light bulb. Some dimmer switches may not be compatible with certain types of bulbs, leading to malfunction or damage to the bulb. Ensure to use a dimmer switch that is suitable for the specific bulb type you have installed.
Lastly, check the connections and fixture for any issues. Loose connections or dirty fixtures can also be responsible for the light not working despite having power. Tighten any loose connections and clean the fixtures if necessary.
By investigating these probable causes, you can pinpoint the issue with your light not working and take appropriate action to restore its functionality. Remember to always exercise caution when dealing with electrical equipment, and consult a professional electrician if you are unsure or unable to resolve the problem.

Troubleshooting the Light Switch
Wiring Issues
One of the most common reasons that a light switch may not be working, even when power is present, is due to wiring issues. To address potential wiring problems, follow these steps:
- Turn off the power to the switch at the main service panel.
- Remove the light switch from the wall, taking care to ensure that all wires are disconnected safely.
- Check each terminal screw to make sure they are tight and secure.
- Ensure all wiring is covered in electrical tape, and that it isn’t too loose.
- Check for any wires touching each other, and rectify if necessary.
- Inspect the insulation around the wires for any signs of deterioration or damage.
Internal Switch Problems
Sometimes, the issue may lie within the switch itself. This could be a result of cheap materials or simply wear and tear over time. Consider testing the switch with a multimeter to assess whether it needs to be replaced. If the switch turns out to be faulty, replace it with a new, compatible model.
Old or Damaged Switch
Lastly, an old or damaged light switch could be the culprit. If the switch has been in use for a long time, it is possible that it may have reached the end of its lifespan. In this case, replacing the light switch with a new one will likely resolve the issue. Be sure to choose a switch that is compatible with your light fixtures and bulbs to ensure optimal performance.
Remember to maintain safety precautions while handling electrical components and consult an electrician if you are unsure or uncomfortable attempting any repairs yourself.
Inspecting the Light Bulb
Non-Compatible Bulbs
It’s important to ensure that the bulb you are using is compatible with your light fixture. Some light fixtures require specific types or wattages of bulbs, and using an incompatible bulb may result in the bulb not working despite there being power. Check the specifications of your light fixture and verify that the bulb you have chosen is the correct type and wattage.
Burnt Out or Faulty Bulbs
Bulbs can burn out or become faulty over time, even if they still have power. This may be due to a variety of factors such as:
- Power surges: An unexpected increase in voltage can cause a sudden rush of electricity to the bulb, damaging it.
- Cheap quality materials: Low-quality bulbs are more likely to burn out or become faulty.
- Overheating bulbs: Excessive heat can lead to the premature failure of a bulb.
- Turning the bulb on and off too often: Frequently toggling the power to a bulb can cause wear and tear on its components.
To determine if a bulb is burnt out or faulty, try replacing it with a new one. If the new bulb works, then the original bulb was likely the issue.
Wrong Wattage
Using a bulb with a higher wattage than your light fixture is designed for can also cause problems. A bulb with too high a wattage may either not work at all or quickly burn out due to the increased voltage. Check your light fixture’s specifications and ensure that you are using a bulb with the appropriate wattage.
By addressing these common issues, you can effectively troubleshoot and resolve any problems related to why your light is not working but has power.
Checking the Circuit Breaker
Tripped Circuit Breaker
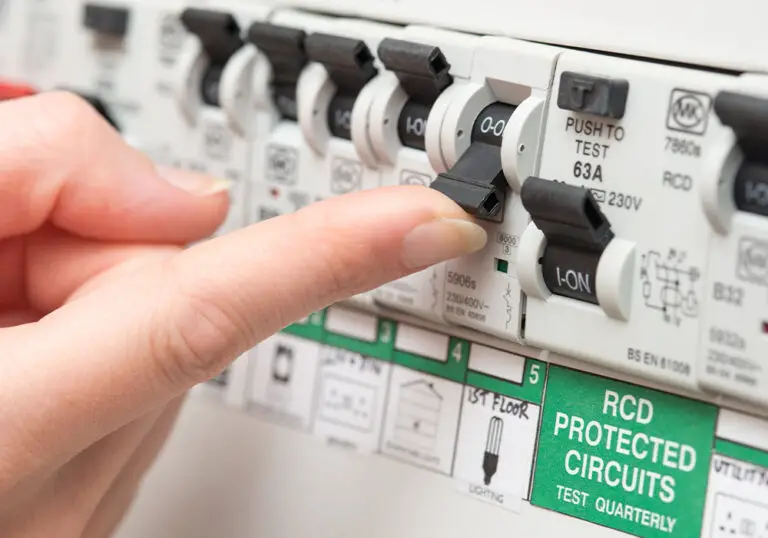
If your light is not working but has power, the first thing to check is the circuit breaker. A tripped circuit breaker can be the cause of the issue. To identify a tripped circuit breaker, locate it in your consumer unit or fuse box. The switch handle may appear in the mid position or could be all the way off. To reset a tripped breaker, first ensure it’s turned all the way off, and then switch it back into the on position.
If the circuit breaker trips off again after resetting, it indicates there’s still a problem with the light fixture or the electrical circuit. In this case, it’s best to consult a professional electrician to diagnose and fix the issue.
Faulty Circuit Breaker
A faulty circuit breaker can also be a reason why your light is not working despite having power. Over time, circuit breakers can wear out and become unreliable, potentially causing intermittent or complete disruption of power to the light fixture.
To test if the circuit breaker is faulty, you can follow these steps:
- Turn off the main power at the consumer unit/fuse box.
- Carefully remove the suspect circuit breaker from the panel.
- Replace it with a new one or a known working breaker with the same rating.
- Restore power to the unit and check whether the light fixture is now working correctly.
If the issue persists even after replacing the circuit breaker, it’s likely that the problem lies elsewhere in your electrical system or the light fixture itself. Again, it’s recommended to consult a professional electrician to evaluate and address the issue.
Understanding the Role of Light Fixtures
When dealing with a light that is not working but has power, it is essential to understand the role that light fixtures play. In this section, we will delve into specific components of a light fixture and examine their potential issues.
Issues with the Light Socket
An essential part of any light fixture is the light socket. This is where the light bulb is screwed in, and it provides the electrical connection needed for the bulb to illuminate. If your light is not working despite having power, the light socket could be at fault.
There are a few potential issues with light sockets that can lead to a malfunctioning light, including:
- Loose connections: The connection between the light socket and the light bulb could be loose, preventing the bulb from receiving enough power to illuminate.
- Dirt or debris: Dirt or debris buildup in the light socket can cause poor electrical connectivity and result in a non-functioning light.
- Worn or damaged socket: If the light socket is worn or damaged, the electrical connection between the socket and bulb is not as effective, leading to a lack of power transfer.
To troubleshoot issues with the light socket, you can try cleaning it with a dry cloth or brush, checking for visible damage or wear, and ensuring that the light bulb is tightly screwed in.
Problems with the Wiring Connectors
Another critical component within light fixtures is the wiring connectors. These connectors are responsible for transferring electrical power from the mains supply to the light socket. A fault in these connectors can result in a light not working even though it has power. A few common issues with wiring connectors are:
- Loose connections: The wiring connectors may be loosely connected to either the power supply or light socket, preventing effective power transfer.
- Damaged or frayed wires: Damage or wear on the wires can lead to poor electrical connectivity, causing the light to malfunction.
- Corrosion: Over time, the wiring connectors may become corroded, affecting their electrical conductivity and resulting in a non-functioning light.
To identify problems with wiring connectors, you can visually inspect them for damage or wear, check their connection to the light socket and power supply, and replace any corroded connectors. When dealing with wiring issues, it’s always best to enlist the help of a qualified electrician to ensure safety and proper repair.
When to Seek Professional Help
Sometimes, despite your best efforts to troubleshoot and fix the issue of your light not working but having power, the problem persists. In such cases, it is crucial to know when to seek professional help.
You should consider contacting a qualified electrician if:
- You notice damaged wiring: If you’ve discovered damaged or frayed wiring during your troubleshooting process, it is best to call a professional to handle the situation. Damaged wiring can pose a significant risk of electrical shock or even fire if left unattended.
- The issue is recurring: If your light consistently stops working despite all your attempts to fix the issue, there might be a more complex problem at play. An experienced electrician can properly diagnose and repair any underlying issues.
- You’re unsure about the issue: When dealing with electricity, safety should always be your top priority. If you cannot identify the cause of the problem or feel unsure about the steps you need to take, it is best to consult with a professional electrician.
Remember that DIY electrical work can be dangerous and should only be performed with caution. If you suspect the problem might be too complex or risky for you to handle, do not hesitate to seek the help of a qualified professional. Your safety and the proper functioning of your lighting system are worth the investment.